How Do I Make Paint Look Like Chrome

Disclaimer | This article may contain affiliate links, this means that at no cost to you, we may receive a small commission for qualifying purchases.
Chrome spray paint is probably one of the best things to have happened in the world of painting. It has the ability to enhance the appeal of whatever surface it is being applied on.
However, unlike other types of paints and finishes, it is not that easy to apply. It requires considerable prep work and time to accomplish. To make your paint look like chrome, you will need to do a lot of cleaning and scrubbing in addition to priming.
Only after you follow the rigorous steps, you can start spray painting chrome. If you skip any of them or do not devote sufficient time to the process, your paint will not have the proper sheen.
Don’t be disheartened, though, because you can achieve this task easily if you follow this guide. It discusses the procedure for painting chrome in some easy-to-follow steps.
So, let’s get started!
What Is Chrome?
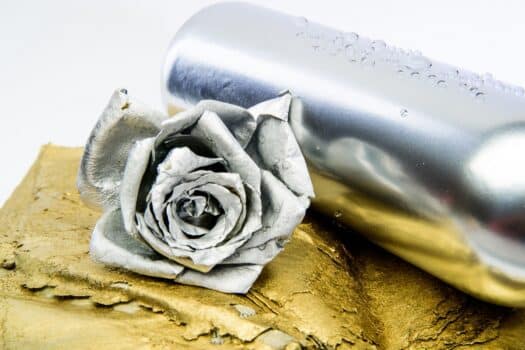
If you are wondering what chrome is, then let us clear it up for you. Many people may get the idea that chrome is a color, but in reality, chrome is not an actual color itself. Instead, it is more like a paint shade or finish that can be used to complement a proper color, such as white or blue.
The chrome finish is highly reflective, which is its most distinctive feature. Hence, you can use it to make the color look highly glossy. In this regard, most chrome finishes are done in silver or white color, which gives it a mirror-like appearance. But you can also use other colors for the purpose.
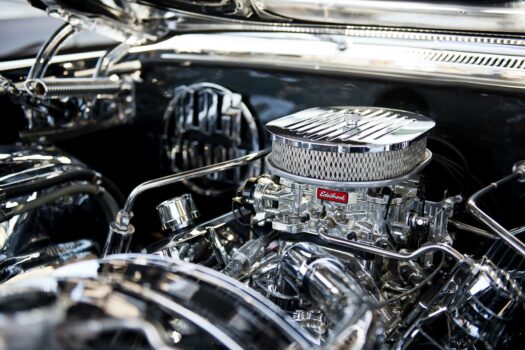
Chrome finishes are fairly common in automotive paint, where they are applied to cars to make them look more appealing. Generally, chrome spray paint or chrome plating is used on automobiles to achieve the desired finish. And if you apply the correct techniques, then you can replicate the shiny appearance of chrome on other surfaces too.
How Do You Make Paint Look Like Chrome?
Given the shiny, metallic appearance of chrome, it can be used only with certain types of paint. If you do not use the appropriate paint and medium, you might not be able to achieve an authentic chrome finish. To be more precise, it may lack high metallic sheen or become washed out too quickly.
Therefore, chrome paint should be ideally done on a shiny medium such as a metal surface, glossy paper, vinyl, or plastic. As for the paint, you can use acrylic or latex metal paint to achieve the metallic finish. However, in the case of acrylic paint, you might need to take some additional steps to achieve the desired level of sheen.
First, you will need to prepare the surface to apply the chrome paint. If it is a metallic surface, you can rub it with sandpaper to make it smooth and seamless. In the case of vinyl or plastic, the surface does not require sanding. Instead, you can make it smooth by rubbing the surface with a foam brush.
Following that, you need to spray a primer over the surface and allow it to dry. In the next step, a base color coating needs to be applied over it. We recommend using a darker color, such as black or gray, but you can choose other colors if you wish.
After it dries, you can apply the chrome finish spray paint over the base color to achieve the metallic sheen.
Can You Paint Over Chrome?
There’s no doubt that a chrome paint finish can be quite attractive. But like any other paint, it can degrade over time. This is especially true if you use chrome paint for bumpers, rims, exhausts, or any other automotive parts that have to withstand a lot of wear. In that case, the paint may start flaking or peeling off, or it might simply become too dull.
However, you can repaint the chrome to restore its shine in such cases. But the process is a bit longer since you will first need to remove the old chrome layer so that you can add new layers. So, now you may be wondering, “How can you spray paint over chrome?” which we have answered below.
Step 1: Clean The Surface
To make the painting process smooth, you will need to clean the chrome surface with soap and water. Mix some liquid soap or detergent in a bucket of warm water. You need to use a sufficient amount of soap for the best results. Stir the solution until the soap is uniformly mixed.
Then, dampen a clean rag in the soapy water, and rub it vigorously over the paint surface. This will take out any dirt and grime embedded on the surface. Subsequently, you can use a brush dipped in the soapy solution to clean some of the harder-to-reach areas. Once you have cleaned out every nook and cranny, you should let the surface dry for a while.
Step 2: Sanding The Surface
The next step involves sanding the paint surface to scrape off the old chrome. For this, you will require different grades of sandpaper. Initially, you need to use heavy grit sandpaper to remove the chrome layer. We recommend using 120 grit sandpaper to achieve the desired results. Rub the sandpaper in side-to-side and circular motions to cover the entire area.
After you have scrubbed off the top layer, you should switch to a 240 grit or 320 grit sandpaper. These finer gradations will help remove any remaining chrome on the surface. If you want, you can wipe the surface with a cloth first to clear up the loose particles. You can scrub only on the areas where there are paint traces left, which is more convenient than scrubbing the whole surface.
To achieve the best results, we recommend rubbing a 240 grit sandpaper in circular motions for this phase. After you have made sure that there is no more paint left, you can remove any roughness from the surface using the 320 grit sandpaper.
Furthermore, it will help remove any scuff marks left behind by the coarser sandpapers. And at the end of all the sanding process, you will have a smooth and clean surface to work on.
Step 3: Fix Any Imperfections On The Surface Of The Material
Before you prime and paint the surface, it is best to find and fix any imperfections on it. In many cases,there may be cracks, gaps, or other similar irregularities, especially on wood or metal surfaces.
These irregularities may be caused due to extensive usage or during the sanding process. If you ignore them, these might hamper the painting process or mess up the smoothness of the surface. However, if the surface is free from any cracks or damages, then you can skip this step entirely.
But, if it is not, then this is the best time to repair these damages because once you apply the primer, it will be difficult to fill them up. Wipe the surface with a damp cloth, and use metal filler to close all the cracks or gaps. Once applied, give the filler some time to dry before you can proceed further.
On that note, you should be careful with the metal filler. Use it only in the gaps, and wipe off any excess filler with a cloth. After it dries, you can wipe the surface again, but now with a dry cloth. This will get rid of any debris and loose filler.
Step 4: Covering Up
In this step, you will need to cover up the parts of the surface that will not be painted. You can use painters’ tape over these parts, which will effectively protect them against the primer and the paint.
If the surface is too large, the painter’s tape will not be enough. In that case, you can use newspapers or rags to cover them up. Make sure to leave no gaps, or else the paint may seep into these covered areas.
As an additional protective measure, you can cover up the floor with newspapers too. That way, you can avoid making a mess and consequently make the clean-up a little easier.
Step 5: Apply The Primer
Once you are done with the above step, you need to apply the paint primer. Start by applying a thin layer over the surface. This will help the paint adhere better and eliminate any flaking or peeling. Not only that, but the primer also protects the paint against water and corrosion.
We recommend applying the primer with a spray gun, but if you don’t have that, you can use a conventional paintbrush or paint roller. And you can apply the primer side-to-side by using broad strokes to speed up the process. You don’t need to worry about the parts that won’t be painted since they are covered up already.
While one coat of primer is usually sufficient in most cases, you can apply multiple coats to increase its effectiveness. In that case, you need to give one layer enough time to dry before applying the subsequent one.
If you use brushes and rollers, make sure that there are no drips, as that can be wasteful. Besides, it might make the primer layer too thick in certain spots, which will affect the paint adhesion.
Step 6: Paint The Surface
After you spray paint the primer, it is time to get started with painting. First, you need to apply a base layer of paint over the surface. If you are painting a metal surface, such as the exterior of automobiles, you can spray latex metal paint over it. For plastic, wood, or vinyl, you can use acrylic paint as well.
Regardless of what you use, we suggest using broad side-to-side strokes to paint large surfaces within a short time. And only one or two layers of the base paint coat is sufficient. If you are using a brush or roller, make sure to prevent the paint from dripping and splattering.
Moreover, the paint should be allowed to dry completely after application. This usually takes about a few hours, but you can accelerate the process with the help of a fan. Once it is dry enough, you can spray the chrome finish over it. Make sure to shake the spray can before applying it to the surface evenly.
You can apply multiple coats of it to enhance the shine of the chrome while allowing the paint to dry between successive coatings. After drying the final layer, you can remove the coverings and tapes and perform the necessary clean-up to finish the task.
Helpful Tips To Keep In Mind When Painting Chrome
While following the steps mentioned above, it would help if you keep some additional aspects in mind, which is what this section is all about. If you follow them, they can make the whole process a lot easier and safer.
1. Use Protective Gear
Using adequate protective gear is one of the most important aspects to consider before a paint job or any other DIY job, for that matter. If you are applying chrome paint, a lot of dust and dirt is generated from the cleaning and scrubbing processes.
Apart from that, the paints contain chemicals that can be harmful if they come in contact with any body part. This is especially true for chrome paint, as it contains toxic chemicals that can cause a range of adverse reactions.
Therefore, you should use protective equipment such as goggles and masks to avoid dust and fumes. You need to wear full-sleeve shirts, fully covered trousers, and boots as well as gloves and caps to stay protected.
2. Paint In A Well-Ventilated Area
This is an additional safety tip that you can follow, just to be safer. Chrome paint or any other paint and primers contain toxic fumes that can be harmful if inhaled. And as we have said before, the scrubbing and sanding procedures generate a lot of dust.
Besides, these dust particles may settle on other surfaces, such as walls, ceilings, floors, or other objects, which can make the cleaning process a nightmare. Also, the fumes from the paint are flammable, which poses a serious fire hazard.
Thus, if you paint in a well-ventilated space, all the dust and fumes can be eliminated from the workspace. Make sure there are sufficient exhaust fans, doors, and windows to allow the dust and fumes to escape. If possible, you can do the paint job outdoors too.
3. Avoid Over-Spraying
One common issue faced by many DIY painters is that they end up over-spraying in a particular spot. This makes the paint seem uneven and causes a lot of paint wastage as well. In the case of chrome paint, it can lead to an uneven shine. Some areas may seem more reflective than the rest of the body, which will make the entire paint job look awkward.
So, to ensure an even finish, you need to avoid over-spraying. To do that, hold the spray at least 10 inches away from the surface, which will distribute the paint evenly over an area. Also, you need to keep moving to avoid too much paint buildup in one spot.
4. Test The Color Beforehand
It is always advisable to check the color before you buy or apply it. The paint indicated on the container may be a bit lighter or darker than the shade you are looking for. If you check it beforehand, you can purchase it accordingly or get it replaced in case the paint is not of the desired shade.
5. Use Good Quality Paint
You should always use good quality paint, even if it’s slightly more expensive. That way, you can rest assured that the paint will not degrade, become pale, or lose its shine after some time.
Make Paint Look Like Chrome Frequently Asked Questions ?
What Surfaces Can Be Painted Chrome?
Due to its appeal, chrome is commonly used for automobile paint jobs. On top of that, you can use chrome paint on plastic objects, bathroom fittings, light fixtures, household appliances, wooden or metallic furniture, and in some cases, even fabric and paper.
What Type Of Household Appliances Can You Paint Chrome?
The appliances that are best suited for chrome are kettles, toasters, ovens, radiators, space heaters, and fans. On that note, if you are using chrome for kitchen appliances such as kettles, toasters, or ovens, you need to make sure that the paint is non-toxic. You should also ensure that it does not come into direct contact with food.
Are There Any Colors That Look Like Chrome?
As we have said before, chrome is not precisely a color but a finish. So, technically, you won’t find a chrome color on the market. However, there are some close alternatives, such as gold, silver, or other metallic shades. If you spray paint them correctly, you can achieve the mirror finish of chrome paint.
Are Chrome Plated Surfaces Rust-Resistant?
No, conventional chrome-plated surfaces are not entirely rust-resistant. Because of the chemical composition of chrome, it can react with the oxygen and moisture present in the air to become rusty. However, many modern chrome finishes are designed to be rust-resistant to a great extent. Also, you can avoid rusting by applying a suitable primer to protect the surface.
Make Paint Look Like Chrome Final Words
That is all we had to say about making your paint look like chrome. After going through the steps we have discussed, it doesn’t sound so difficult now, does it?
We have included some valuable tips that you can follow to make the painting process even easier. If you want the paint to last long, you can apply a paint sealer after everything is done. However, it is completely optional, as proper care can also help with that.
With that, we have arrived at the end of this informative guide. We will be back again with more informative guides in the future.
Bye for now!

